The idea of gardening is appealing to many. What’s not to love about saving money while growing your own food? Eating healthy is effortless when you have grown juicy tomatoes and leafy lettuce yourself.
While gardening sounds tempting, not everyone has the luxury of enough land to start their own vegetable plot. Many of our program participants, especially those living in urban areas, don’t have backyards at all.
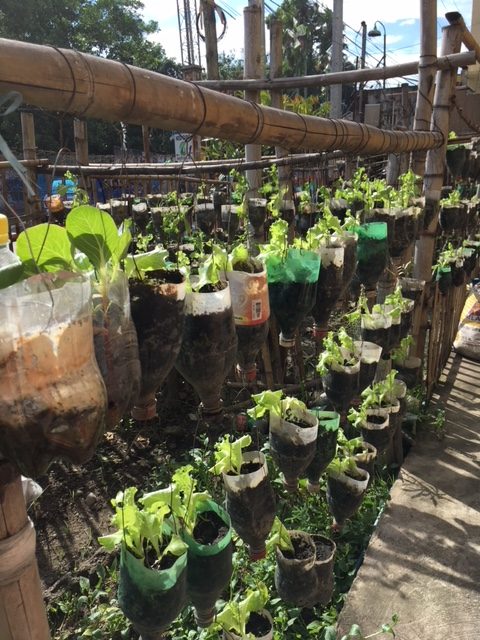
In week two of the Transform program, participants learn how to make their own container gardens, a solution for the space-starved. Container gardens are efficient, eco-friendly, and fun! Old bottles are repurposed as the containers, and these gardens can be hung in any sunny window or balcony.
We don’t want to keep all the fun to ourselves. Here’s how you and your family can make your own container gardens.
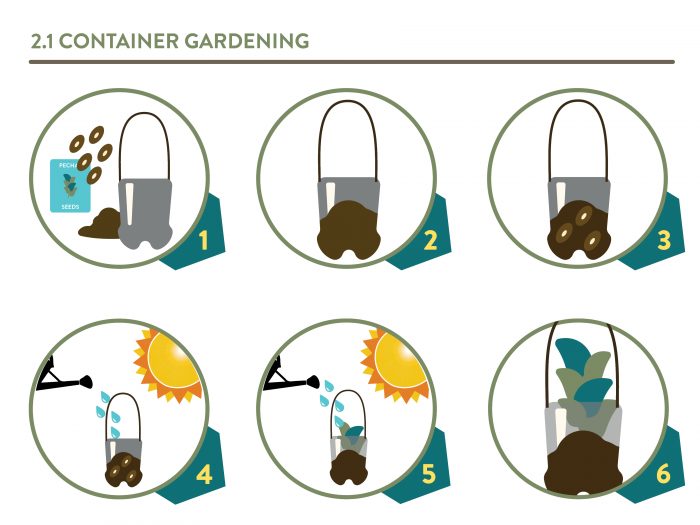
Get a plastic bottle and carefully cut it in half. Soda bottles work great for this! Poke two holes on either side of the bottle and pass a wire through the holes to make a handle. Twist the wires closed around the hole.
Poke four holes in the bottom of the bottles about a half inch from the bottom. This will allow the mini garden to drain excess water. Fill the bottles about half way with a mixture of soil and fertilizer. Transform participants usually use vermicast, an organic fertilizer made by worms, but you can use any kind of fertilizer.
Place a seed in the center and push it into the soil by about one knuckle’s length (2 cm) then loosely cover it with more soil. Water your new plant and then finish up by finding a nice sunny place to hang it. Now you just need to wait for the delicious vegetables to grow!